Ghost Blog on GitHub Pages using GitHub Actions
In this post I will share how I built up this website for free using Ghost CMS, GitHub Pages, and GitHub Actions.
Ghost
Ghost is a content management system for self publishing your own website - and it can be self hosted in a Docker container. To start this project you need to be running the Ghost Docker container on your development computer. This means you need to have Docker installed locally - and there is a handy guide on the Docker website for the main operating systems.
Before starting up the Ghost Docker container you will need a directory where you can store the Ghost content (static assets, SQL database, etc). For this post I setup a new repository in GitHub to store the content so it would stay under version control.
To start the Ghost Docker container on your local machine, open a console and navigate to the directory you have setup with a GitHub repository and execute the following command.
docker run -d -p 2368:2368 -v content:/var/lib/ghost/content ghost:alpineThis command will run up the latest version of Ghost using the alpine Docker image. It will run on the standard 2368 port and mount the current contentdirectory into the Docker container at /var/lib/ghost/content. This means that any changes to the Ghost instance (new posts, theme, etc) will be exposed to the current working folder and can be committed to GitHub.
After running the command, you should be able to access the locally running version of Ghost at http:// localhost:2368/. At first you will need to setup an account (only saved in your local database), and then you will be able to add new pages, posts, and change the navigation settings etc. You will also be able to configure the theme for your website.
GitHub Workflow
Once there is a locally running instance of Ghost, the next step is to get it running in GitHub Pages. The key to do this is using GitHub Actions with the help of a GitHub workflow. To setup a GitHub workflow you need to add a .github\workflows folder. Each GitHub workflow is just a yaml file within this directory.
name: Deploy Ghost and Generate Static Site

on:
  push:
    branches: [main]

jobs:
  build:
    runs-on: ubuntu-latest
    steps:
      - name: Check out Model Repository
        uses: actions/checkout@v2
      - name: Run Ghost
        run: docker run -d -p 2368:2368 -v ${{ github.workspace }}/content:/var/lib/ghost/content ghost:alpine
      - name: Sleep for 10 seconds
        uses: jakejarvis/wait-action@master
        with:
          time: "10s"
      - name: Install ghost-static-site-generator
        run: npm install -g ghost-static-site-generator
      - name: Generate Static Site
        run: gssg --url https://jameslawlercom.github.io --subDir 2021-11-27-ghost-blog-on-github-pages-using-github-actions
      - name: Deploy to Github Pages
        uses: JamesIves/github-pages-deploy-action@4.1.7
        with:
          branch: gh-pages
          folder: static
In the first section, the trigger is configured. This means that this GitHub workflow will run when a commit is made on the main branch.
on:
  push:
    branches: [main]
The scripts section defines the different scripts that will run one after the other during the GitHub workflow. The first simply checks out the latest version of the code to the build instance.
jobs:
  build:
    runs-on: ubuntu-latest
    steps:
      - name: Check out Model Repository
        uses: actions/checkout@v2
The next script is similar to the command we use to run Ghost locally. This will actually run up the instance of Ghost on the GitHub Actions build virtual machine. The main difference here is the use of the build parameter ${{ github.workspace }} to access the path to the working directory of the build folder.
- name: Run Ghost
  run: docker run -d -p 2368:2368 -v ${{ github.workspace }}/content:/var/lib/ghost/content ghost:alpine
As Ghost can take a few seconds to start up, a wait script is added to pause the process for 10 seconds.
- name: Sleep for 10 seconds
  uses: jakejarvis/wait-action@master
  with:
    time: "10s"
Once enough time has passed, the next script installs globally a npm script that can crawl the Ghost instance and generate a static version of the website.
- name: Install ghost-static-site-generator
  run: npm install -g ghost-static-site-generator
The next script will run this tool to do the crawl and generate a static version of the website into a folder called static. The --url property is used to specify the base domain of the static website (in this case a GitHub Pages site). The --subDir property is used to specify a sub folder of the static website (in this case the name of the GitHub Pages project name).
- name: Generate Static Site
  run: gssg --url https://jameslawlercom.github.io --subDir 2021-11-27-ghost-blog-on-github-pages-using-github-actions
Finally the last script will deploy the static folder which contains our website to the gh-pages branch of the repository so that it is available on GitHub Pages.
- name: Deploy to Github Pages
  uses: JamesIves/github-pages-deploy-action@4.1.7
  with:
    branch: gh-pages
    folder: static
GitHub Pages
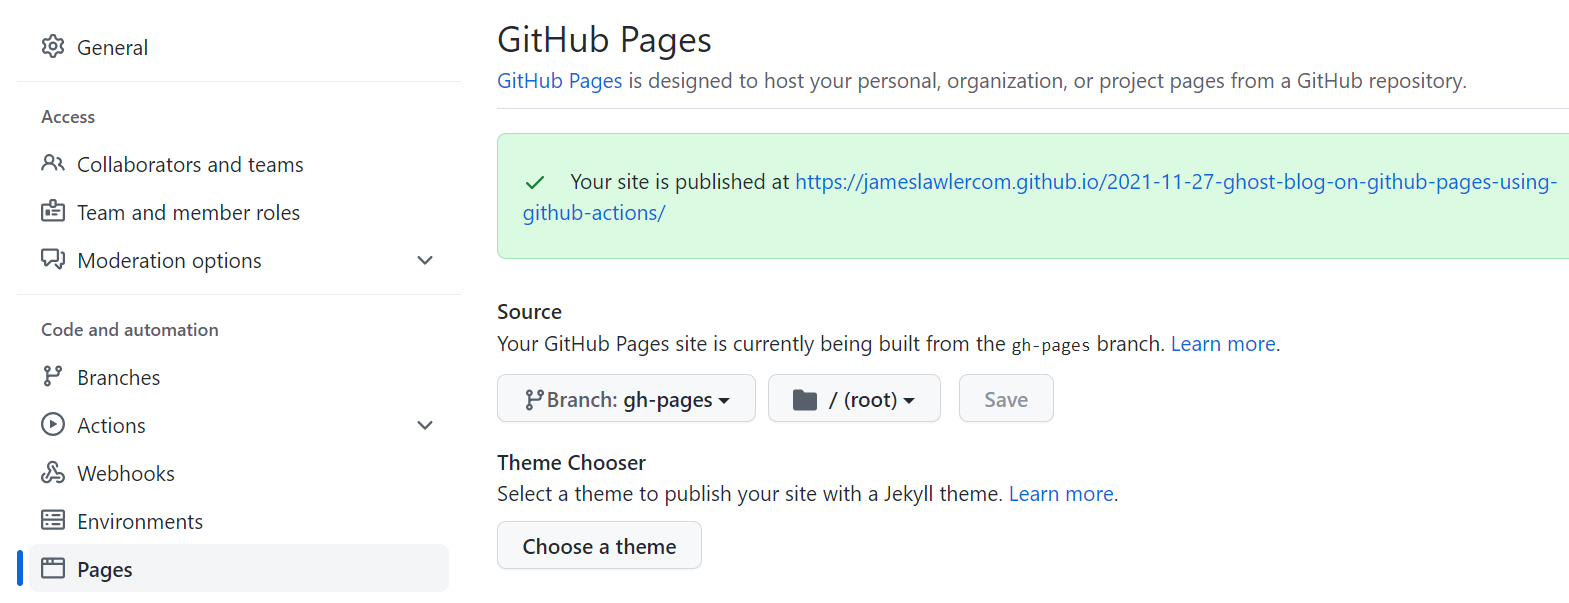
The last stage of this project is to enable GitHub Pages on your repository. This is done via the Pages tab in the repository settings.
Summary
After updating your blog using the Ghost admin website and push push to the main branch the changes, the ghost blog will be started in a docker container on the GitHub Actions server, a static version will be crawled automatically and then saved to the GitHub pages branch of the repository. A few minutes later, your website will be running on your GitHub Pages website.
There is a demonstration repository available here which demonstrates the GitHub Actions and GitHub Pages project.